Power Washing Tips for Beginners: How to Clean Surfaces Safely and Effectively

Power Washing

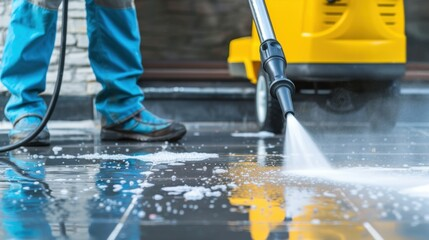
It is easy to underestimate how quickly outdoor surfaces can lose their clean look. Dirt settles in, stains build up, and before long, areas like driveways, walls, and patios start to look worn and neglected. Power washing offers a fast and effective way to restore these surfaces, but without the right approach, it can also cause damage.

Knowing a few essential tips can make the difference between a successful clean and costly mistakes. Visit https://www.certifiedsoftwash.ca/ for more details.

Understanding How Power Washing Works

Power washing uses high pressure water to remove dirt, grime, mold, and other contaminants from surfaces. The force of the water breaks down buildup that would otherwise require extensive scrubbing. While it is a powerful cleaning method, it needs to be used carefully to avoid damaging materials.

Different surfaces respond differently to pressure. Hard surfaces like concrete can handle higher pressure, while softer materials such as wood or siding require a gentler approach. Understanding how the process works helps ensure that the right technique is used for each situation.

Learning the basics of power washing is the first step toward achieving safe and effective results.

Choosing the Right Pressure Setting

One of the most important tips for power washing is selecting the correct pressure level. Using too much pressure can damage surfaces, strip paint, or create uneven marks. On the other hand, using too little pressure may not effectively remove dirt and stains.

Adjusting the pressure based on the material being cleaned is essential. Concrete and stone can typically handle higher pressure, while wood and delicate surfaces require lower settings. Starting with a lower pressure and gradually increasing it can help find the right balance.

Taking the time to choose the correct setting protects surfaces and improves cleaning results.

Using Proper Technique

Technique plays a major role in the effectiveness of power washing. Holding the spray nozzle at a consistent distance from the surface helps ensure even cleaning. Moving the nozzle in a steady, controlled motion prevents streaks and uneven spots.

It is also important to avoid focusing on one area for too long. This can create visible lines or even damage the surface. Overlapping each pass slightly helps achieve a uniform finish.

The angle of the spray should be controlled as well. A slight angle allows the water to lift dirt without forcing it deeper into the material. Practicing good technique leads to better and safer results.

Pre Treating Stains and Problem Areas

Not all dirt can be removed with water alone. Stubborn stains such as oil, grease, or mold may require pre treatment. Applying a cleaning solution before power washing helps break down these substances, making them easier to remove.

Allowing the solution to sit for a short time gives it a chance to work effectively. This reduces the need for excessive pressure and helps protect the surface. For heavily stained areas, repeating the treatment may be necessary.

Pre treating ensures a more thorough clean and reduces the effort required during washing.

Protecting Surrounding Areas

Power washing can affect more than just the surface being cleaned. Water and debris can spread to nearby areas, potentially causing damage. Covering plants, outdoor furniture, and electrical fixtures helps protect them during the process.

It is also important to be mindful of windows and doors. High pressure water can force moisture into areas where it should not go. Taking precautions helps prevent unintended damage and keeps the cleaning process controlled.

Being aware of the surroundings ensures that the entire area remains safe during power washing.

Safety Tips to Keep in Mind

Safety should always be a priority when power washing. The force of the water can cause injury if not handled properly. Wearing protective gear such as gloves and closed shoes helps reduce the risk of accidents.

Maintaining a firm grip on the equipment is important, as the pressure can create strong recoil. Keeping a stable stance and being aware of footing helps prevent slips and falls, especially on wet surfaces.

Avoid pointing the spray at people or pets. The high pressure can cause harm even from a distance. Following basic safety practices ensures a secure and controlled cleaning experience.

Cleaning Different Surfaces Effectively

Each surface requires a slightly different approach when power washing. Driveways and sidewalks can usually be cleaned with higher pressure, making it easier to remove dirt and stains. Decks and wooden surfaces need a gentler touch to avoid splintering or damage.

Siding and exterior walls often require moderate pressure and careful technique. Using too much force can strip paint or damage the material. Adjusting both pressure and technique based on the surface ensures effective cleaning without causing harm.

Understanding these differences helps achieve the best results across various areas.

Avoiding Common Power Washing Mistakes

Many issues with power washing come from simple mistakes. Using the wrong nozzle or pressure setting can lead to uneven cleaning or surface damage. Skipping preparation steps, such as removing debris or pre treating stains, can also reduce effectiveness.

Another common mistake is rushing through the process. Taking time to clean methodically ensures better results and reduces the risk of missing spots. Being patient and attentive leads to a more professional finish.

Learning from these common errors helps improve the overall outcome of the cleaning process.

Maintaining Results After Cleaning

Once a surface has been power washed, maintaining its condition helps extend the results. Regular cleaning prevents heavy buildup from forming again. Simple steps such as sweeping debris and addressing stains early can make a big difference.

Applying protective treatments or sealants to certain surfaces can also help preserve their appearance. These treatments create a barrier that makes it harder for dirt and moisture to penetrate.

Consistent maintenance reduces the need for frequent deep cleaning and keeps surfaces looking their best.

Final Thoughts

Power washing is a highly effective way to restore and maintain outdoor surfaces, but it requires the right approach to achieve the best results. From choosing the correct pressure to using proper technique and prioritizing safety, each step plays a role in the overall outcome. Understanding how to handle different surfaces and avoid common mistakes helps ensure a successful cleaning process.

With the right knowledge and careful execution, power washing can transform dull and dirty areas into clean and refreshed spaces. In the end, it is not just about removing dirt but about preserving the condition and appearance of the surfaces that surround you.

What Is Pest Control for Removing Rats and How Do You Get Rid of Them Effectively?

Pest Control

Hearing scratching sounds in the walls at night or finding droppings in hidden corners can be unsettling. Rats are not just a nuisance. They can damage property, contaminate food, and pose serious health risks. The good news is that effective pest control methods can eliminate rats and prevent them from coming back when done properly.

Getting rid of rats requires more than a quick fix. It involves a combination of inspection, removal, and long term prevention. Understanding the right approach helps you solve the problem safely and effectively. Contact Pest Control Port St Lucie for more information.

Why Rat Infestations Are a Serious Problem

Rats are highly adaptable and can live in a variety of environments. They are attracted to food, water, and shelter, which makes homes and buildings ideal places for them to settle.

They can chew through wood, plastic, and even electrical wiring, leading to structural damage and potential safety hazards.

In addition to property damage, rats can spread bacteria and contaminate surfaces, making it important to address infestations quickly.

Step 1: Identify Signs of Rats

Before starting pest control, it is important to confirm that rats are present. Common signs include droppings, gnaw marks, scratching noises, and strong odors.

You may also notice greasy marks along walls or nesting materials in hidden areas. Early detection helps prevent the infestation from growing.

Identifying where rats are active allows you to target the problem more effectively.

Step 2: Eliminate Food and Water Sources

One of the most important steps in rat control is removing what attracts them. Rats need a steady supply of food and water to survive.

Keeping your home clean, storing food in sealed containers, and disposing of garbage properly can make your space less appealing.

Removing clutter and debris also reduces hiding spots and nesting areas. This step alone can significantly reduce rat activity.

Step 3: Seal Entry Points

Rats can squeeze through very small openings, making it easy for them to enter homes. Sealing these entry points is essential for both removal and prevention.

Check areas around doors, windows, pipes, and vents for gaps or cracks. Use materials such as metal mesh, caulk, or steel wool to block access.

Blocking entry points is one of the most effective long term solutions, as it prevents new rats from entering.

Step 4: Use Traps and Bait

Trapping is one of the most common methods for removing rats. There are different types of traps available, including snap traps, glue traps, and live catch traps.

Snap traps are widely used because they are effective and provide quick results. Glue traps and live traps are alternatives depending on your preference.

Baiting is another option, often used in combination with traps. It attracts rats and helps increase the chances of capture.

Proper placement is important. Traps should be set along walls, near entry points, and in areas where activity has been observed.

Step 5: Consider Professional Pest Control

For larger or persistent infestations, professional pest control services may be necessary. Experts can conduct thorough inspections, identify hidden entry points, and apply targeted treatments.

Professional services often use a combination of methods, including traps, bait stations, and exclusion techniques. This comprehensive approach ensures more effective results.

They also provide follow up monitoring to ensure that the infestation has been fully resolved.

Step 6: Use Natural and Preventive Methods

In addition to traps and treatments, natural deterrents can help keep rats away. Strong scents such as peppermint oil may discourage rats from entering certain areas.

Maintaining a clean yard, trimming vegetation, and keeping outdoor areas free of debris also reduces the likelihood of infestations.

Long term prevention involves regular inspections and consistent maintenance.

Step 7: Maintain Long Term Prevention

Removing rats is only part of the solution. Preventing them from returning is equally important.

Ongoing practices such as sealing gaps, managing waste, and keeping the environment clean help maintain a rat free space.

Regular inspections allow you to catch any new signs early and take action before the problem grows.

A combination of removal and prevention is the most effective strategy for long term control.

Final Thoughts

Pest control for removing rats requires a structured and consistent approach. From identifying the problem and eliminating attractants to using traps and sealing entry points, each step plays a vital role in solving the issue.

While small infestations can often be handled with basic methods, larger problems may require professional help to ensure complete removal. Taking action early and maintaining preventive measures can protect your home from future infestations.

In the end, effective rat control is not just about getting rid of pests. It is about creating an environment that no longer invites them in, keeping your home safe, clean, and secure.

Common Cabinet Refinishing Mistakes and How to Avoid Them

Cabinet Refinishing Sacramento

Cabinet Refinishing Sacramento is a great way to give your kitchen or bathroom a fresh new look without the cost of a full remodel. However, it’s important to understand the common pitfalls of this project.

Before beginning any paint job, thoroughly clean the cabinet surfaces. This will ensure that the paint bonds well to the surface.

Poor Preparation

One of the most common cabinet refinishing mistakes is failing to clean and sand cabinets before applying paint or stain. This step is important because it helps the new finish adhere to the surface and hides any damages. It is also essential for a smooth and even finish.

Grease, oils, and other build-ups prevent paint or stain from adhering properly. Therefore, it is necessary to clean surfaces thoroughly with a degreaser before starting the refinishing process. A professional cabinet refinishing company will have the right solutions and methods to ensure the surface is clean before applying any materials.

Many DIYers attempt to save time and money by using tinted poly, waxes, or stains to change the color of their cabinetry. However, these products often streak and wash off with regular use. Not only that, but they may cause permanent damage to the woodwork. This can lead to chipping, cracking, and fading of the new finish over time.

Another mistake is applying a latex paint that was designed for walls, instead of cabinets. Latex paint isn’t durable enough to withstand daily wear and tear, and it will chip or peel faster than a hard-wax oil-based paint. Likewise, some refinishers skip the primer phase when painting their cabinets, which can lead to a uneven and patchy finish.

Choosing a trendy cabinet color is another common error that can make your space look outdated within a few years. It is better to stick with a neutral color or natural wood stain for a timeless look that will increase the resale value of your home. This way, you can always add pops of color with non-permanent accents like towels or plates.

Refinishing your cabinets is a big project and should only be completed by professionals who understand the proper techniques and materials for this type of work. If you’re looking for a quality refinishing service, contact N-Hance of Mid-Hudson Valley today. We offer expert cabinet refinishing services in Yorktown Heights, Cortlandt Manor, Carmel, and Poughkeepsie, NY. Our professional team can give you the updated kitchen you want without the hassle of a complete remodel.

Improper Selection of Materials

Refinishing cabinets is a cost-effective way to give your home a fresh new look. However, it can be a complicated project that involves removing hinges, knobs and handles, replacing cabinet hardware, staining and painting. If you’re not careful, you can make mistakes that will affect the quality of your finished product and your overall experience.

One of the most common mistakes people make when refinishing their cabinets is using low-grade materials. Cheap adhesives and paints will not stand up to high levels of usage, so they are less likely to last as long as higher-quality products. This can result in chipping, bubbling and peeling over time.

Another mistake that many refinishers make is using the wrong type of material for their specific needs. For example, some refinishers will use a polyurethane designed for walls instead of cabinets, which isn’t durable enough and may not adhere to the surface of the cabinet. The wrong type of stain also may not bond well with existing finishes, and can leave behind unsightly blotches or drips.

When refinishing cabinets, it’s important to choose a color that will look good with your room’s décor and will appeal to a wide range of tastes. It’s important to choose a neutral or natural wood stain so that you can easily refresh the color with non-permanent accents like rugs, curtains and towels. Avoid choosing a trendy color to help keep your home resale value high and reduce the chance of getting sick of your new color in a few years.

The final cabinet refinishing mistake that many homeowners make is not cleaning and prepping their surfaces properly before applying a stain or paint. Grease, oil and other build-ups will prevent paint and stain from adhering to the surfaces, so it’s essential to remove them beforehand. A professional cabinet refinishing company will have the right solutions and knowledge to clean your cabinets before application.

If you’re refinishing your own cabinets, be sure to follow the manufacturer’s recommended drying times and work in a well-ventilated area. Working in a poorly ventilated space can be dangerous due to fumes from paints and stains, and may cause uneven finishes or smudges.

Poor Application Techniques

Painting or staining cabinetry isn’t always an easy project. It can take a week or more to complete the work on your own, so it is important to prepare thoroughly and properly for best results. Not sanding and prepping your cabinets can result in poor adhesion that will ultimately lead to chipping, peeling and other defects down the line. This is why many homeowners choose to hire a professional for cabinet refinishing services.

One of the most common mistakes that do-it-yourselfers make is not sanding their cabinets before applying a new coat of paint or stain. Sanding your cabinets will help ensure that the new material adheres well to the old surface, and it also helps to create a smoother finish. It is vital to properly sand all surfaces before applying a new coating of paint or stain, including corners and crevices.

Another mistake that do-it-yourselfers often make is not using primer before they apply a fresh coat of paint. The use of primer will also allow the new color to stick better to your cabinets, and it will hide any imperfections, stains or the original shade. Not priming your cabinets will leave them with streaks and remnants of the previous color, which will be very obvious and displeasing to potential home buyers.

Not selecting the right type of paint or stain is another common mistake that many DIY’ers make. There are many products on the market, and it is important to select a product that is designed for cabinetry. Cabinet-rated polys are usually a better choice than other products sold in hardware stores, as they are formulated to withstand the daily wear and tear of cabinetry. Other types of finishes, such as lacquer, may look aesthetically pleasing, but they will not hold up against regular use and cleaning.

Whether you’re looking to give your kitchen a refresh or you want to transform them into a magazine-worthy space, cabinet refacing and refinishing is an excellent option. By avoiding these common cabinet refinishing mistakes, you can achieve your dream kitchen with ease and confidence. For expert help with your cabinets, contact the experts at N-Hance of Palm Beach & Martin County!

Poor Workspace Ventilation

A poorly ventilated workspace can be dangerous for cabinet refinishers. It is vital that your work area has plenty of airflow to prevent breathing in fumes from the paints and stains used. Using fans and opening windows to circulate the air will help keep you safe from hazardous chemicals and ensure your cabinet refinishing project goes smoothly.

Whether you are looking to give your kitchen that magazine-worthy look or just want an updated style, refinishing is an affordable option for making your dream kitchen a reality. However, refinishing cabinets is a large task that requires careful planning and attention to detail for the best results. There are many common mistakes that can be made during this process that will lead to a less-than-perfect end result. These mistakes can also increase the amount of time and money needed to complete the project.

Improper cleaning: Many homeowners skip the steps necessary to properly clean their cabinet doors and drawers before refinishing. This includes using a degreaser to remove grease, oil and grime from the surface of the wood before sanding. Failure to thoroughly clean the surfaces of your cabinetry can cause problems with the bond between the wood and the new coatings. It can also make the finish appear dull or uneven.

The use of tinted poly, waxes and stains to change the color of cabinets is a common mistake that can lead to disastrous results. These products are often recommended by clerks at home improvement stores, but they may not be ideal for bonding to preexisting finishes. These coatings can streak, peel and leave disproportionate coloration on the existing cabinetry. They can also be easily scratched or damaged with harsh household cleaners or rough scrubbing pads.

Not removing hardware: Another common mistake is not removing the hardware before refinishing. This can create an uneven appearance and may even make the hinges or handles hard to operate. It is important to carefully remove all doors, hinges and drawer knobs to fully prepare the surfaces for painting.

If you are considering refinishing your cabinetry, it is crucial to be aware of these common mistakes so that you can avoid them. By avoiding these pitfalls, you can rest assured that your finished product will be professional and high-quality. Contact N-Hance of Palm Beach & Martin County today to learn more about how we can transform your kitchen with our cabinet refinishing services!

Water Damage Cleanup – The First Steps in Water Damage Restoration

Water Damage Cleanup

Water damage can be caused by a number of reasons. Some are more obvious than others, but all need to be dealt with quickly to minimize the damage and avoid long-term issues like mold growth.

The first step in Water Damage Restoration Utah is a property inspection to classify the water type and determine a restoration plan. This includes assessing moisture levels, identifying potential safety risks and determining labor requirements.

1. Remove the Water

The first step in water damage cleanup is to remove as much of the water as possible. This can be done with a wet/dry shop vacuum, towels, and commercial-grade dehumidifiers. This helps the space dry faster and reduces the risk of mold growth.

After the water is removed, it’s important to dehumidify the area and clean any affected materials and contents. This ensures that any bacteria, viruses, and fungus is killed and that the surfaces are safe for use.

Moisture can travel under floorboards and behind walls, so it’s important to use moisture meters and infrared thermal cameras to uncover any hidden pockets of saturation. Commercial-grade fans and dehumidifiers can then be used to remove any remaining moisture and bring the spaces back to their normal moisture levels.

Any items that can be saved should be moved to a safe location as soon as possible. This can help prevent any additional damage and protect the items from being lost or ruined by mold and mildew.

2. Dry It Out

Water restoration is a complex and time-consuming process that requires skill, training, and extensive knowledge of the properties of water. Whether it’s caused by natural disasters or plumbing mishaps, every situation demands a tailored approach to restore the property and mitigate long-term damage. By embracing proactive maintenance strategies and relying on expert services, you can safeguard your property against costly damage and restore it more effectively.

A primary goal of water damage restoration is to stop the influx of moisture and accurately assess the damage. This can be achieved by identifying the source of the water, removing all visible sources, and pumping out standing water. After the influx of water has been stopped, a wet/dry shop vacuum and dehumidifiers are used to remove remaining moisture and dry out areas affected by water damage. This step is essential because porous materials like carpet furniture and drywall can hold water even after appearing dry on the surface, resulting in foul orders and mold growth.

Additionally, the presence of water can also introduce contaminated pathogens that require proper cleaning and sanitization to prevent bacteria, viruses, and other hazards from entering living spaces. In order to work safely, it is important to disconnect any electrical sources and wear protective gear to prevent shocks or other life-threatening situations. It is also important to document any damages or losses, as this can help streamline insurance processes.

3. Remove Structural Components

After water damage, structural components like walls and floors are inspected for signs of water damage. If there is any, it’s important to remove them as soon as possible to avoid serious damage. This is also a good time to inspect appliances and other items that are close to water sources like plumbing, to ensure they are safe for use again.

This is another step in water damage restoration that should only be done by licensed professionals. They have the equipment and training to remove any items that are unsafe and may be prone to mold or structural damage. It’s also essential to note that the longer items remain in place, the more damage they will cause.

The structural drying process involves removing moisture from deep within building materials to prevent structural damage and other long-term problems. This is a very thorough process that requires the use of professional-grade tools.

Professionals begin the process by removing excess water using wet vacuums and extraction equipment. They then assess the amount of moisture present in building materials by measuring it with moisture meters. They also rely on air movers, dehumidifiers, and fans to expedite the drying process and ensure all pockets of moisture are eliminated. Visible signs of a successful structural drying process include stable temperature and humidity readings, a lack of musty odors, and no warping or deformation in affected materials.

4. Inspect the Area

The first step in water damage restoration involves inspection of the area by a professional. They will look for stains and mold, inspect for structural damage (cracked and warped foundation, walls, floors and ceilings), and test for moisture levels. They may also use a thermal-imaging camera that detects infrared energy and converts it into a visual image. This tool shows hot or cold spots hidden behind walls and allows the specialist to determine whether the leak is still active.

It’s important to turn off the electricity before entering an area with standing water, and if it’s safe to do so, to evacuate the area in case of sewage backup or severe flooding. This will reduce the risk of injury and minimize the need for costly repairs. It’s also a good idea to take photos and notes to support insurance claims.

Once the area has been inspected, the next steps in the process are water extraction, dehumidification, disinfection and drying of all materials that can’t be saved. This includes personal belongings, carpeting and other flooring, drywall (only the affected portions are removed), paneling, shelving, cabinets and other structures. Then comes the repair work, which can include everything from putting in new carpet to rebuilding walls and ceilings. Mold prevention or remediation is also often included in this stage, and all work is performed following strict safety protocols. Then, a final inspection is done to ensure that all work has been completed properly and completely.

5. Inspect the Foundation

Water damage restoration is a complex process that involves assessing the extent of the problem, removing standing water, cleaning and sanitizing affected areas, repairing damaged components and thoroughly drying out the area to prevent mold growth. It can be expensive, but neglecting it can lead to more serious structural damage and health risks for building occupants.

A well-maintained home foundation can help prevent water damage and reduce the risk of costly repairs. Having proper drainage and landscaping around your home is an important step to protect the foundation from moisture. It is also crucial to perform regular inspections of your foundation.

Signs of water damage in a home include cracks, especially long cracks that extend from the walls to the ceiling, slanting floors and warped walls. Other signs of foundation damage are a musty odor that lingers even after thorough cleaning and the presence of mold or mildew. These are all indicators that it is time to call a foundation repair specialist.

A shaky foundation can be caused by flooding, broken pipes, clogged toilets, dishwasher lines, sump pump failure or sewer backup. Having a faulty foundation can be a major issue for homeowners and affect the value of the property. Performing regular inspections can prevent foundation problems and costly repairs, so be sure to look for signs of water damage at your home. It is also important to understand the types of foundations, common issues, inspection processes and repair options.

6. Inspect the Electrical System

Water and electricity are a dangerous mix. When it infiltrates wiring, switches, outlets, and panels, it creates short circuits and arcs that can cause electrical fires and shocks. If left unchecked, the damage can corrode components and lead to additional problems in the future. Regular checks by a professional can prevent this problem from happening in the first place.

When water damage affects the electrical system, it must be addressed immediately. First, professionals will assess whether power should remain disconnected to protect people from exposure to shock hazards. They will then use thermal imaging and insulation resistance testing to identify deterioration and other damage that might not be apparent with visual inspection.

Damaged wires and components are then cleaned using specialized solvents to remove contaminants and prepare them for drying. Corrosion inhibitors may be used to reduce the risk of future problems. Restoration professionals will then test circuits and protection devices before restoring power.

While some components can be salvaged after water damage, others must be replaced entirely. This may include rewiring entire rooms or replacing major appliances like refrigerators and washing machines. As a result, the cost of repairing electrical damage caused by water damage can be more expensive than other types of repairs. However, acting quickly to address the damage can minimize costs. The longer water stays in the affected area, the more damage it causes.

Visit our Professional Services Blogs

Chris Atkins Lawncare, Atticus Landscaping, Treasure Coast Pressure Wash, Gulf Beach Plumbing, Marlborough Plumbing, Guns And Hoses Pressure Washing, Ambrose Construction, Coral Gables Pressure Washing, Willco Photography, Roofing Akron, Danalogsdon Roofing El Cajon, EC Siding Roofing Windows, Aurora Gutter, American Insurance Source, ECO, etdn, Denison Service League,  Roofing Blog, Atlantic Vinyl Windows, Brookshires Fireplaces, JD Advanced Remodeling, Product Judgment, Master Dry Foundation Repair, Moe’s Hip, Elta Patio Paramount, Rock Around The Clock Festival, Learn, Play, Beyond, MoralesT Gardening, Car Window Tinting Perth, Duncan Carpentry, Gatestone Lighting, Mid Missouri Mold Inspections, Stucco Repair Albuquerque, Wausau Siding Hire, Munster Tree Care, Blue Granite Homes, Custom House, CENTRAL OS, Atlanta Pavers, Phillips Law Firm, Brent Ryder MasonryWalker Construction Drywall Division, RJ Law, Caledon Plumbing, DDS Tech USA, Maine Mortgage Services, Inckpen, Seasons at Rose Creek, Cottonwood Place Dental, Cosmetic Laser 2000 

What Is Construction?

Construction is a broad field that includes building homes, factories, and infrastructure. J&R Construction professionals who work on these projects experience the sense of accomplishment that comes from seeing their efforts come to fruition.

To successfully participate in construction, you need a strong combination of technical knowledge and problem-solving abilities. Additionally, physical stamina is crucial for working in challenging conditions.

construction

Building Design

Building design is the creative process that transforms a client’s vision into a tangible, functional structure. It includes a combination of artistic flair, technical information, and sustainability ideas to create spaces that are both aesthetically pleasing and practical.

A strong building design is crucial for ensuring the viability of a project. By addressing key issues early in the planning stage, construction professionals can avoid costly changes during the build phase. This helps ensure that the final product meets project objectives and complies with all relevant regulations.

In addition, a well-designed building will increase property value and attract tenants. This can also reduce maintenance costs and improve operational efficiency. Building design is a multifaceted field that involves several professionals, including architects, engineers, and interior designers. The process begins with a consultation with the client to understand their goals and needs. Once the designer has a clear understanding of the project, they can develop a concept design that balances aesthetics with functionality and cost.

The next step in the building design process is to develop detailed plans for the project. This requires analysing various factors, including the site’s location, materials, and local regulations. The building design team must also take into account the client’s budget, timeline, and compliance requirements. This information is used to create a detailed budget and schedule, which must be approved by the client before construction can begin.

Once the building design is complete, the project managers can develop a plan for construction. They must work with a number of different stakeholders, including the client, engineers, architects, interior designers, and contractors. This can be challenging, especially when working with large projects. To streamline communication, building companies often use a design-build model, where they take responsibility for both the design and construction of the project.

During the building design stage, it is important to consider all possible complications and risks. This will help prevent costly reworks during construction, which can delay the project and impact the client’s bottom line. Ideally, all potential problems should be addressed during the planning stage, so that the project can be completed on time and within budget.

Building Materials

Building materials are the raw elements used to create a structure, whether it’s a home or a skyscraper. They are essential in ensuring that the structure is able to withstand the stresses of everyday use and environmental factors such as earthquakes or hurricanes. In addition, high-quality materials can help make the construction process easier, as they are typically more consistent in quality and come with manufacturer support. The types of materials chosen also impact a building’s aesthetic and can reflect the desired architectural style of the project.

The building materials used in a project depend on the needs and goals of that particular project, including the budget. Some materials are more expensive than others, and the choice of materials can have a significant impact on the overall cost of a project. Using higher-quality materials can result in lower maintenance costs and long-term energy savings. However, this may require a larger initial investment.

A variety of building materials are available, including glass, brick, steel, concrete, and wood. Some of these materials are natural and have been used for thousands of years, while others are synthetic or made from recycled components. The material selection process is critical to the success of a project, as it impacts the safety, durability, and efficiency of the finished product.

Choosing premium building materials ensures that the finished structure will be durable and long-lasting, with superior strength and aesthetics. High-quality materials are also more resistant to corrosion, weathering, and other environmental factors, which can save on repair and replacement costs. These benefits are often well worth the initial investment in the best-quality materials.

Choosing building materials that are environmentally friendly is becoming increasingly important. Many people are concerned about the amount of waste generated by construction projects, and some are experimenting with “living” building materials that can heal themselves or replicate. These materials are being hailed as the future of construction, as they will reduce maintenance and repair costs and help minimize environmental impacts. To be truly green, a building must not only be energy efficient, but it must also be a good neighbor.

Building Construction

The building construction phase entails turning the designs into reality on the site or sites. This involves clearing the land and preparing it for work. It also requires obtaining the appropriate permits and ensuring that all safety standards are met throughout the process. It is during this time that the actual construction of the building takes place. The building construction process may also include installing plumbing, electrical fixtures, and other necessary equipment and structures.

The type of structure being built influences the construction method used. For example, a building with reinforced concrete walls will have a different building process than one made of wood. Different methods of construction are continually being developed to improve the structural integrity of buildings, reduce the cost and duration of the construction process, and ensure greater sustainability. These advances in technology have also led to the development of durable construction materials, which allow builders to create structures that are more resistant to environmental factors and last longer.

Depending on the project, the construction phase can be split into multiple sub-phases. For example, a project may require preliminary works such as ground preparation or levelling, excavations, or laying foundations, which can be undertaken by specialist contractors while the design of the main structure is being finalised.

When the design is complete, it must be reviewed and approved by the relevant authorities. This may be a lengthy process, particularly if the building is being constructed in a populated area or if it will be subject to strict environmental regulations. Those responsible for the review may include civil engineers, structural engineers, mechanical engineers, electrical engineers, fire protection engineers, planning consultants, architectural consultants, and archaeological consultants. The role of a lead designer is often included in the team to coordinate the various disciplines and provide oversight on the overall design.

Once the construction phase is complete, the contractor must hand over all plans, models, and operating manuals to the project owner. This allows the owner to become familiar with all aspects of the new building and to make any adjustments needed. Regular maintenance is also an important part of this process, as it extends the lifespan of building materials and systems, reduces long-term operation costs, and maintains a high level of comfort and safety for occupants.

Building Maintenance

Building maintenance is the work that goes on behind the scenes to ensure a facility is in good working order for its occupants. It can involve a wide range of tasks, depending on the needs of a particular property. It typically includes both preventive and corrective maintenance activities. Preventive maintenance includes scheduled inspections, treatments, and part replacements that help prevent issues from arising. These activities often focus on equipment or systems that use a lot of energy, such as HVAC units or plumbing.

It also encompasses routine cleaning and yard maintenance tasks. These may include things like sweeping walkways, removing trash regularly, and painting or cleaning surfaces. It can also include landscape maintenance, such as trimming trees and shrubs, or water management services, like irrigation systems or fountains. Lastly, it can include emergency repair services, which are performed in response to specific requests or issues.

Both of these types of maintenance activities are important for a facility’s functionality and the safety of its occupants. They help to minimise downtime and prolong the lifespan of building components. Without these essential activities, the performance of a building will slowly degrade over time. This can cause problems for occupants and impact the business’s day-to-day operations.

In addition, consistent maintenance of a building can help to improve efficiency. Well-maintained systems operate at a higher capacity and use less energy, which can save money on utility bills. This can also help to reduce a company’s environmental impact.

Building maintenance is a key part of any organization’s facilities strategy. This is especially true for businesses that rely on the consistent operation of their brick-and-mortar locations to serve customers.

A comprehensive maintenance program helps to ensure that the building is up and running when a customer visits, which can make a strong impression and promote brand loyalty. It is also crucial for minimising risk for the business by protecting its assets and maintaining a high level of customer service. For this reason, many companies offer a comprehensive maintenance plan as a part of their building services.

Visit our Professional Services Blogs

Smart Choice Plumbing And Air, Sanitize My Airducts, Bethesda Locksmith, Golden Coast Cleaners, Advanced Concrete Staining, Home Pool Cleaners, Brayhines Septic, Shaka Pool And Spa Cleaning,Mr Clean And Shine, Best Appliance Repair Long Beach, Gulf to Bay Water Remediation, Garage Door San Francisco, Richmond Flooring, Fence Builders Woodlands, Colorado Springs Auto, Fuel Frontlines, Expert 24 Option, Sacramento Roseville Real Estate, SLO Homes, Philadelphia Towing, State Powerwashing, Truck Tires Worldwide, Website Translation, Construction Company Farmington NM, Green Home Los Angeles, Trinity SEO Marketing, Electric Fireplaces, Argos Bookkeeping, Christopherson Drywall,Garage Door Installation, Missouri Personal Injury Lawyer Blog, Alvins Auto Body, Carpet Care Pros, Las Vegas Concrete, Clark Concrete Company, Deck Builders Missour City, Lechleitner Builders, Medical Health Insurance Policy, Royal Siding Windows, Carpet Steam Cleaners Review, Go Greeen Lawn Painting, Oakwood Skate Deck, Texas Home Remodeling And Painting, USA Home Repair Remodeling, Dream Home Remodeling Services, Brent Lawn Homes, Great Ernm Homes, Accelerated Orthodontic, Arctic Cooling And Heating, Baltimore Heating And Airconditioning

Costs and Benefits of Roof Replacement

When considering roof replacement, it’s important to consider the costs and benefits. A new roof can help improve your home’s energy efficiency, add curb appeal, and increase value.

Roof Replacement

The climate where you live impacts your roof’s lifespan. Repairing frequent damage can become costly and may result in a shorter overall lifespan.

A new roof represents an expensive investment, but it offers a return on your investment in terms of increased resale value and reduced repair costs. A roof replacement can also save you money on energy bills. Taking the time to understand the cost of a roof replacement can help you make an informed decision.

The most significant cost factor is the roofing materials chosen. Roofing material prices range from budget-friendly asphalt shingles to high-end slate or metal roofing. These materials offer different aesthetics and longevity, but each has its own unique cost. In addition to roofing materials, building supplies such as underlayment and flashing add up quickly and significantly to the total cost of the project.

Another important factor in determining the cost of a roof replacement is the extent to which any additional structural repairs are needed. Often, resealing or patching weakened places in the roof deck will be necessary to prevent leaks and other damage. This may add an extra $1,000 to the overall roofing project cost.

Some roofs feature structures like chimneys or skylights, which require special materials and installation techniques. In these cases, the cost of replacing the roof will likely be higher than for a flat or square-roof house.

The size of the house is another significant factor in determining the cost of a new roof. Generally, larger homes will need to have more roofing materials and labor than smaller homes. This is because a larger roof covers more surface area and is therefore more complex to install.

Other factors that can add up to the cost of a roof replacement include the size of the existing gutters, the condition of the attic insulation, and any other special requirements or considerations for the project. For example, if the roof is located in a flood zone, special construction and waterproofing will be required.

Lastly, homeowners should consider financing options for their roof replacement project. Depending on their situation, this could include a home equity loan or a cash advance. A home equity loan allows homeowners to borrow against the value of their property – minus what they still owe on their mortgage – and is usually delivered in one lump sum. A cash advance, on the other hand, is a short-term funding solution that provides immediate access to funds.

Aesthetics

A roof is not only a vital structural component of a home or commercial building, but it also provides an opportunity to enhance the overall aesthetic of a property. Whether you want to create a modern architectural statement, or complement the character and charm of a historical landmark, you can improve the visual appeal of your home through careful consideration of roofing materials, colors, and design.

The aesthetics of a roof are important for many reasons, including the personal satisfaction of homeowners and occupants, the value of a home, and its integration into the surrounding environment. For example, in residential communities, a visually appealing roof can enhance curb appeal and increase the resale value of a home. Additionally, many homeowner associations require a certain aesthetic standard for roofs to maintain consistency and beauty throughout the neighborhood.

Choosing the right color and style for your roof is a crucial part of creating an attractive exterior, as well as maintaining its performance and durability. Aesthetics can also play a role in energy efficiency, as the right roof design can reduce cooling costs. Furthermore, many homeowners choose to invest in a green roof to minimize their environmental impact.

Aesthetics can also have a significant effect on the value of a home, particularly in older properties with specific visual defects such as fading or curling shingles and sagging roofs. A new roof can improve a home’s resale value, and many homeowners choose to replace their old roofs before selling in order to add a high-quality finish that increases resale value. Furthermore, a new roof can protect against the damaging effects of storms and other natural disasters. This is especially important in areas prone to extreme weather conditions, which can devastate a house’s structure and value.

Energy efficiency

A new roof adds value to a home, and it can also help to lower energy bills. New roofing materials are highly efficient, preventing heat from entering the house and minimizing air leaks. They can be paired with improved attic insulation and ventilation options to further reduce energy costs. If you’re considering selling your home in the future, a new roof will increase your chances of getting a good price.

Old and damaged roofs often allow moisture into the home, resulting in mold, mildew, wood rot, and structural damage. Replacing your roof before these issues develop can save you from expensive repairs and restore the value of your property.

The energy efficiency of your roof plays a crucial role in your heating and cooling costs. Many modern roofing materials use reflective coatings to minimize heat absorption and limit thermal expansion and contraction. This can significantly reduce your energy costs and your reliance on heating and cooling systems, which can lead to a significant reduction in your carbon footprint.

A well-insulated attic and roof can prevent the loss of heat during cold weather, reducing your energy expenses. You can also choose ENERGY STAR shingles, which have been certified by the Environmental Protection Agency to reduce your energy usage. These shingles are made with low-sloped, reflective tiles and pass the EPA’s stringent requirements for a high ENERGY STAR rating.

Integrating energy efficiency upgrades during a roof replacement project can result in significant savings on utility bills and reduce your home’s carbon footprint. At Trusted Roofing, a GAF Certified Contractor and Google Guaranteed company, we believe that the combination of a quality roof with energy-efficient upgrades is a wise choice for both homeowners and the environment. We can walk you through the cost of various energy-efficient roofing materials to help you make an informed decision. Contact us today to schedule an appointment. We serve clients throughout the Nashville area.

Warranty

A warranty is an important part of a roof replacement project. It protects your investment and provides peace of mind in the event of a problem. Reputable roofing contractors and manufacturers typically offer warranties on their products. These warranties may be limited or unlimited in duration and include coverage for labor, materials, and other expenses. In addition, they often cover damages caused by environmental factors. If you’re considering a reroofing project, it’s worth asking the contractor about their manufacturer’s roof warranty and any potential additional coverage options.

A reputable roofing contractor will have no problem explaining the manufacturer’s warranty terms and conditions to you. This will give you a good understanding of the warranty’s scope, limitations, and benefits. You can also use this information to compare manufacturers and roofing contractors.

Generally speaking, most standard roof warranties cover manufacturing defects in the roofing materials and workmanship. They may cover repairs or replacement costs for up to 20 years. Some may even extend to 50 years or more, depending on the roofing material used. Many of these warranties also provide extended coverage for algae resistance, impact resistance, and wind resistance, among other things.

If you’re planning on selling your home in the near future, it might be a good idea to transfer the warranty to the new buyer. This can be done by contacting the manufacturer directly or by referring to your roof warranty pack that was provided to you by the roofing contractor. You’ll likely need to pay a small fee and meet any other requirements that are specific to the warranty provider.

It’s important to note that most roofing warranties do not cover normal wear and tear or acts of nature. This means that any unexpected repair costs that aren’t covered by the warranty will come out of your own pocket. You can avoid this by opting for a non-prorated warranty, which will provide you with consistent coverage throughout the life of your roof.

Another option is a no dollar limit (NDL) warranty, which offers a replacement value of up to the original cost of your roof. This type of warranty also accounts for inflation and can be a valuable asset in a competitive real estate market.

How to Spot a Nursing Home Abuse Attorney

If you notice any unexplained changes in your loved one, such as physical abuse, a decline in personal hygiene, or financial irregularities like unexplained withdrawals from their bank account, it could be a sign of nursing home abuse. Regular communication with your loved ones and careful observation are the best ways to spot any potential abuse.

Home Abuse Attorney

When most people think of nursing home abuse, they envision physical mistreatment like hitting, punching, and other forms of violent behavior. But abuse in long-term care facilities can take many forms, from neglect to emotional and financial exploitation to sexual abuse. Visit https://chicagoelderabuselaw.com/ to learn more.

Neglect includes any act that fails to meet a patient’s basic needs, such as feeding, bathing, and dressing them. It can also include giving a resident the wrong medication or providing them with food that isn’t appropriate for their health condition. The underlying cause of this type of abuse can be anything from staff shortages to understaffing, poor training, or even management decisions that prioritize profit over patient safety.

Emotional or psychological abuse, meanwhile, includes any act that causes fear, distress, or pain in a senior. It’s often harder to spot than physical or neglective harm, but it can include belittling, yelling, threatening, and causing embarrassment. It can also lead to mental problems like anxiety, depression, or PTSD.

Sexual abuse involves non-consensual sexual contact, including unwanted touching and rape. It can also involve forcing a resident to witness or perform sexual acts, sexual photography, or forced nudity. Elderly women are at a higher risk of this type of abuse, but men can be victims as well.

In some cases, a loved one’s neglect or exploitation in a nursing home may manifest as an unexplained injury, sudden changes in their health or eating habits, or the disappearance of personal belongings. A skilled Buffalo nursing home abuse lawyer could investigate to identify any accountable parties and secure the compensation your family member deserves. They can also help with finding a new placement for your loved one, where they can receive the proper care they deserve.

Physical Abuse

Physical abuse is the most recognizable type of nursing home abuse and often results in injuries. While physical abuse can occur on purpose, it is more commonly the result of inadequate staffing or a lack of proper training for nursing home employees.

Abuse is not limited to hitting or punching a resident; any time an employee uses excessive force against a resident, it can be considered physical abuse. Bruises and cuts that do not have a medical explanation are common signs of physical abuse in nursing homes, along with missing or broken personal property such as eyeglasses or dentures. Unwanted or forced sexual contact can also be a form of physical abuse, as can any unexplained changes in a resident’s finances, including opening new accounts or credit cards, unusual charges, and unexplained financial transactions.

Neglect is just as serious as physical abuse and can include failing to provide a resident with food, water, or medicine. It can also include ignoring a resident’s complaints or failing to report a resident’s injury/illness quickly enough to medical professionals.

If a loved one has been the victim of physical or emotional abuse in a nursing home, it is important to contact an experienced legal team as soon as possible. The Jersey City nursing home abuse attorneys at Grungo Law can amplify your loved one’s voice, recover compensation for the resulting financial damages, and hold the responsible parties accountable. If an acceptable settlement cannot be reached, our attorneys are fully prepared to take the case to trial to ensure your loved one receives maximum compensation. Call us today to get started. A free consultation is available to all clients.

Emotional Abuse

Emotional abuse in nursing homes can take many forms. It may include yelling, humiliation, and social isolation. It can also include verbal threats, intimidation, and the use of physical actions to cause fear or distress. It is more difficult to spot than physical abuse because there are no visible signs of harm, but it can still be extremely damaging to a victim’s mental health and quality of life.

Often, the perpetrator of emotional abuse in a nursing home is one of the caretakers who are responsible for the resident’s wellbeing. Depending on the situation, this may be a nurse, doctor, or other member of the care team. However, it can also be a family member or even a live-in caregiver.

It is important to pay close attention to your loved one’s behavior and interactions with staff members at the nursing home. Any sudden changes could be a sign of mistreatment. It is also helpful to have regular, consistent visits with your loved one at the nursing home. This will give you a better understanding of their mood and how they interact with the staff there, which can be helpful when it comes to reporting emotional abuse.

If your loved one is experiencing emotional abuse in a nursing home, you should contact the management staff and report it. Additionally, you should seek legal guidance from an experienced Tampa nursing home abuse attorney. By filing a lawsuit, you can obtain justice, protect your loved one, and bring about much-needed changes at the facility. You may be able to recover damages for your loved one’s emotional distress, medical expenses, and other losses. In addition, you can receive punitive damages for egregious misconduct.

Neglect

When nursing homes fail to provide basic needs such as food, water, and hygiene and essential medical care, they may be committing neglect. This type of abuse can involve one person or it could be a systemic problem that results in all residents being treated unfairly.

Physical neglect in nursing homes can include failing to properly feed, bathe, or medicate a resident; leaving them unattended for long periods of time; or not preventing and treating bedsores (pressure ulcers). It’s important that families visit their loved ones frequently to monitor their well-being, and to ensure they are getting proper medical attention if needed.

Emotional neglect can include humiliation, threats, and intimidation that cause psychological harm. It also includes a lack of socialization or interaction and isolation, which can lead to depression, loneliness, and cognitive decline.

Financial exploitation is another form of elder abuse that involves misuse of a senior’s funds or property. It can take many forms, including stealing money or valuables, forging signatures on checks, and coercing residents into changing their will or power of attorney. Signs of financial exploitation in nursing homes can include unexplained withdrawals from bank accounts, missing personal belongings, or unpaid bills despite having adequate funds.

Specialized nursing home abuse attorneys can help hold negligent facilities accountable and prevent future harm by bringing legal action. They are also familiar with state and federal regulations that protect senior citizens and know how to find evidence of malpractice. They can spot ways to establish liability that may not be obvious to an ordinary person, and they are often able to get nursing homes and insurers to take the case more seriously. Make sure to choose an attorney who communicates effectively and is committed to pursuing justice for your family.

Wrongful Death

Wrongful death in nursing homes happens when a family’s loved one dies as the result of negligence or abuse by the nursing home. It can occur in many different ways, from medical neglect-such as skipping medication, giving the wrong medication, or not administering medication at all-to physical and emotional abuse or simply substandard care. Those who have lost a loved one as the result of a nursing home’s negligence or abuse have the right to pursue justice with a top-tier wrongful death attorney.

When pursuing a wrongful death claim against a nursing home, it is important to gather and preserve all available evidence. This may include incident reports, witness statements, and physical proof like photos or videos of conditions within the nursing home. It is also important to keep in mind that a civil wrongful death lawsuit has a lower burden of proof than criminal proceedings, which requires proof beyond a reasonable doubt.

Nursing home wrongful deaths often arise from unsafe or unsanitary conditions, including infections caused by poor hygiene and cleanliness or lapses in infection control. For example, bedsores-skin ulcers that develop if residents remain in the same position for too long-can cause sepsis, which is fatal if left untreated.

Other common causes of wrongful death in nursing homes are falls, accidents, or injuries that are preventable with adequate training and supervision. Falls are especially dangerous for the elderly, as they can lead to broken bones, head trauma, spinal cord injuries, and even wrongful death. Accidental deaths in nursing homes can be prevented by installing handrails, providing proper supervision, and providing specialized equipment such as wheeled walkers or stair lifts. It is also critical to properly train staff in how to use such equipment and ensure all staff members receive sufficient training in proper lifting techniques.

The Importance of a Well-Functioning Commercial Electrical Installation

Electrical wiring is a critical component of a commercial property, providing the power that drives lighting and appliances. The main electrical panel distributes electricity across a building, and circuit breakers safeguard against overloads.

Electrician

Various regulations govern the installation of electrical systems in commercial properties. Adherence to these rules is vital for safety and compliance. Keep reading the article below to learn more about Commercial Electrical Installation.

Electrical wiring in commercial spaces is far more complex than the average household. As a result, there are different safety standards that must be followed to ensure the integrity of an electrical system.

Failure to follow these standards can lead to fires, electrical shocks, and other dangerous hazards. Fortunately, there are a number of measures that can be taken to prevent these problems and maintain the safety of your employees and tenants.

Always shut off the power supply before beginning any work on an electrical system to eliminate the risk of accidental shocks. Also, it is important to use personal protective equipment (PPE) when working with wires, such as insulated gloves, safety glasses, and hard hats. It is also crucial to make sure that the area where electrical work is being done is well-lit and free from obstructions. Lastly, it is important to label all circuit breakers and switches in order to make them easily identifiable.

Another step in ensuring electrical safety is regularly inspecting and maintaining the installation. These inspections can help identify potential problems and issues, such as overheating wires or improper grounding. In addition, regular inspections can help avoid problems that could become worse over time.

A qualified electrician will be able to assess the unique needs of your electrical system and provide the appropriate solutions. For example, if you need to add machinery or other equipment to your business, an electrician can determine whether this will cause a strain on the current system by looking at various factors, including power consumption, circuit breakers, and switches. They will also be able to recommend any necessary upgrades or modifications to the existing wiring.

Reliability

Electrical wiring plays an important role in the reliability of commercial properties, especially when it comes to supporting critical systems like HVAC equipment and office machinery. By working with professional electricians and ensuring regular maintenance and safety checks, business owners can rest assured that their property’s electrical system is providing safe and efficient operations.

The most common issues that can affect commercial electrical installations are usually fairly easy to fix. For example, tripped circuit breakers are often caused by overloads, and can be easily fixed by reducing the amount of devices on the circuit or simply resetting the breaker. Flickering lights are often caused by loose or outdated bulbs that need replacing. It is also essential to use bulbs rated for the voltage of each circuit.

Other problems that may occur can be more complex to resolve. For example, an electrical panel or switchgear that fails to provide adequate power is a sign of an issue with the distribution system. It is essential to check the circuit breaker and fuses, as well as ensure that the grounding system is functioning correctly.

In order to avoid serious issues, it is best to work with a professional for all commercial electrical installation services. They can assist with planning, designing and installing the necessary components to meet your business needs. Moreover, they can advise on the specific requirements for your space, including branch circuits, wiring, electrical panels, and power receptacles. They will also have a good understanding of conductors, such as NM and SE types, as well as general requirements such as outdoor direct burial feeders and busways.

While residential wiring is typically hidden behind walls and covered by plastic sheathing, new commercial electrical installations are generally visible, with the wires running through tube-like conduits. These conduits provide a layer of protection from potential hazards and help keep the wiring organised and insulated. Additionally, new commercial electrical installations are designed for energy efficiency. This can include LED lighting, occupancy sensors and programmable thermostats to reduce electricity costs. This can also be achieved through careful circuit design and incorporating alternative energy sources like solar panels.

Efficiency

When working with commercial electrical installations, there are a number of efficiency measures that should be taken into account. These include using the right wiring, ensuring adequate lighting and safety systems are in place, and avoiding unnecessary energy consumption. These are all vital considerations that can significantly impact the overall cost and effectiveness of a commercial electrical installation.

In addition, the use of efficient electrical systems can reduce operational costs by lowering electricity bills and reducing energy waste. This is achieved through the careful selection of materials, proper insulation, and effective circuit design. Similarly, the use of renewable energy sources can further improve energy efficiency and sustainability.

Commercial wiring is more complex than in residential settings, with greater demands on the system. This includes three-phase power and specialised lighting controls, which require specific designs that ensure they meet the appropriate standards and regulations. Moreover, electrical cables are usually contained in conduits, which provide crucial protection against heat, moisture, and corrosion. This is especially necessary in harsh environments and in areas with a high volume of foot traffic.

Electrical work in a commercial setting is typically conducted with a permit, which must be obtained before the work begins. This is to ensure that the work complies with local laws and regulations, minimising the risk of fires or injuries. Additionally, it also ensures that electrical workers have the proper knowledge and experience to complete the job safely.

Having the right equipment and tools is important for any electrician, but especially when working with commercial installations. The correct tools and equipment are designed to withstand the higher voltages that are commonly found in commercial spaces. These tools are also made to prevent accidental damage and ensure a safe environment for employees.

Another important consideration is the type of sockets and other electrics to be installed in a commercial space. This depends on various factors, including floor occupancy, cabling requirements, and lighting needs. The use of energy-efficient lights is a great way to reduce electricity costs, while back-up power can come in handy for emergency situations.

Lastly, it’s important to adhere to the National Electrical Code (NEC) when working with commercial electrical systems. Keeping up to date with the latest revisions of the NEC can help business owners ensure their electrical system meets the latest standards and safety guidelines. This can protect them against fines, project delays, and even legal liability.

Maintenance

A well-functioning electrical system is a crucial part of every business. From lighting systems to intricate network cabling, commercial electrical installations require meticulous installation and strict adherence to established codes to maximize safety and functionality.

Local, state, and national standards regulate electrical installations to prevent accidents and fires and promote safety for occupants and customers. Strict compliance with these regulations is non-negotiable for contractors and their clients, as failure to comply could result in heavy fines and legal repercussions. To ensure the integrity of a commercial electrical installation, it is important to have a thorough inspection and testing process. This includes a detailed electrical plan, examining the capacity of circuits and wiring, and identifying any potential hazards.

Power surges and voltage fluctuations can damage sensitive equipment and disrupt normal operations. Installing surge protection devices, which monitor voltage and cut off power when necessary, is an effective way to mitigate these problems. These devices can be installed at the electrical panel or in individual rooms, depending on the property’s needs.

Commercial warehouses have unique electrical requirements that differ based on the types of products stored inside. Whether it is large machinery that requires a more robust distribution system or perishable goods that require climate control, your licensed commercial electrician can help. They will take into account your specific needs, and install the right type of equipment that complies with energy regulations and codes.

In addition to ensuring the safety of your electrical wiring, a licensed commercial electrician can help you save money on utility bills by implementing energy-saving solutions. This may include motion sensors, programmable thermostats, and other smart technologies. A licensed technician can also assess your current energy usage and recommend any changes that can improve efficiency.

When working with commercial electrical systems, it is essential to follow proper safety protocols and use personal protective equipment (PPE) such as insulated gloves, goggles, and work boots. This will protect against injuries and ensure that workers are able to complete their job safely. Implementing a “no PPE, no work” policy can also promote a safety-first culture among employees and reduce the risk of electrical shocks and fires.

Brush Roller Or Spray Which Method Works Best for Cabinet Painting?

Cabinet Painting Sacramento

Whether you’re repainting the exterior of your Ann Arbor home or reviving a piece of furniture, choosing the right painting method will determine the quality and finish of your project. Brushing and rolling offer precision and control for projects requiring attention to detail, while spraying offers quick application for larger surfaces and more coverage with less paint waste. Visit Cabinet Painting Sacramento for more details.

Brushes and Rollers

When it comes to painting, choosing the right application tool can make the difference between a project living up to its potential and one that’s a complete disaster. The right brushes and rollers provide an even coat that’s easy to clean, helping you save time and get the look you want.

The type of paint you’re using and the size of your space play a big role in what kind of brush or roller to select, as well. For example, if you’re working with a product that requires a durable finish, you’ll want to use a brush with stiff filaments for crisp lines and a quick clean-up. The extra-stiff Chinex (r) acacia, Tynex (r) nylon or Orel polyester-blend filaments in our Purdy (r) paintbrushes help deliver that durability while creating a nice, smooth surface and eliminating visible brush marks.

For larger spaces, a roller can quickly cover large surfaces and cut down on the amount of time it takes to complete your project. Sherwin-Williams offers a variety of roller covers in different fabric types and nap sizes that match up with the type of paint used, including both natural and synthetic fabrics to suit your style.

We tried a foam, a woven, and a mohair roller to see how each performed on our cabinets. The foam roller provided a thin, even coating with minimal stippling and no noticeable roller marks after it dried. It also shed a little bit of lint, so we would recommend using a de-fuzzer or tack cloth to remove any stray fibers before beginning your project.

The woven roller covered the most area, but it still left a light stippled texture and some roller marks after drying. It did, however, shed a lot less lint than the foam roller, so it could be a good option for smaller areas or for people who like a more subtle finish. The mohair roller performed the best of all, with great coverage and no stippling or roller marks after drying.

Sprayers

Whether you are a professional cabinet painter looking for efficiency or a home DIYer seeking to elevate your painting endeavors, a paint sprayer offers an exceptional toolset to accomplish remarkable and lasting results. This powerful and versatile tool delivers an outstanding finish for all cabinet surfaces and types of materials, including stains and clear coats.

A sprayer’s high-powered atomization produces an even, smooth film, resulting in a flawless and uniform appearance. Combined with proper technique, a sprayer can also cut down project time significantly when compared to traditional rollers and brushes. In addition, a sprayer can easily reach tight corners and recesses, making it the perfect choice for detailed surfaces like cabinet doors and drawer fronts.

If you plan on using a sprayer, make sure to follow proper preparation steps to avoid accidental overspray. Thoroughly mask off appliances, countertops, and other adjacent surfaces to prevent the spread of unwanted paint splatter. Additionally, lay down drop cloths or plastic sheets to protect your workspace from unintentional splatters during the spraying process.

For best results, start by spraying your doors and then moving on to the larger flat areas of your cabinets. When spraying, make sure to work within your comfort level and never extend your reach too far. Aim for an even and thick layer of paint.

Once the doors are dry, you can reattach them to your cabinet frames and then proceed with the remaining cabinet interiors and outer frames. Remember to lightly sand and vacuum the surface between coats to help the topcoat adhere stronger. Most pro’s do a fine sanding between coats and then wipe down with a tack cloth to prepare for the next coat of primer or topcoat.

When it comes to choosing the right sprayer for your cabinet painting project, look for a durable metal gun with adjustable settings that offer flexibility and control. The Fuji Semi-PRO 2 HVLP spray system, for example, offers an excellent option that is suitable for a range of materials and applications. With its high-powered 2-stage motor, this sprayer provides exceptional atomization for a beautiful and flawless finish. Its customizable settings also enable the user to customize the spray pattern and pressure, ensuring consistent coverage on all cabinet surfaces.

Time-Consuming

Painting cabinets is a big undertaking that can take up to a week or more. Whether you’re repainting your cabinets to breathe new life into an outdated kitchen or upgrade a guest bath, proper prep work is key. Proper sanding and priming, as well as applying multiple thin coats of paint, are essential to a long-lasting finish that can endure the daily wear and tear of your cabinets.

A spray gun atomizes paint into a fine mist that can cover large surfaces quickly and evenly. This can help minimize brush strokes, roller marks, and other textural inconsistencies that may occur with a brush or roller. However, a quality sprayer can be expensive and requires specialized knowledge and skills to use effectively. It’s also more time-consuming to prepare a space when using a sprayer, as all hardware must be removed and the surface covered with plastic and tape. Lastly, there’s more overspray and wasted paint when using a sprayer, so your cabinet space will require more cleanup and re-preparation.

The traditional brushing method is a simpler approach that’s often less expensive and forgiving to beginners. It’s important to invest in a good quality brush, as well as sandpaper and primer to ensure the best results. A variety of sized brushes and covers are available to suit different surfaces, including textured woods and high-gloss paints. It’s not uncommon to need to apply several coats of paint to achieve a full, smooth coverage.

Brushing requires more patience and is not ideal for detailed areas, as the brush can leave visible streaks. It can also be prone to drips and spills, particularly for beginners. Regardless of the type of brush used, it’s important to use a high-quality primer and enamel paint that are specifically formulated for cabinets to prevent flaking, chipping, and peeling.

Ultimately, the decision to spray or brush should be based on your comfort level, project goals, and budget. Spraying offers a smooth, professional finish that can elevate the look of your home and boost its resale value, but it’s more expensive and time-consuming than brushing.

Cost

The cost of painting cabinets depends on a variety of factors. The material they’re made from, as well as their condition and any repairs needed, will affect how much it costs to paint them. The type of cabinet paint will also have a significant impact on the overall cost. For example, if you choose to repaint your kitchen cabinets with an oil-based primer that requires several coats to cover the existing color, the process will be slower and more labor intensive than if you use a water-based primer. Additionally, high-gloss cabinet paints are more expensive than matte or satin finishes.

Traditional brush and roller painting offers precision and control, especially for areas with intricate designs or detailed trims. However, this method can take longer to complete and is more costly than spray painting.

According to Slavik, it takes an average of 70 hours to professionally hand-paint a set of 40 cabinet doors and drawers. This includes the time it takes to remove and reinstall all of the hardware. It also doesn’t include the additional time it takes to prep, sand, and clean the area before painting.

To achieve a professional finish, it’s essential to use the right quality of paint and primer for your cabinet doors. The type of primer you need will depend on the material your cabinets are made from, as well as any repairs required. For wood cabinets, Slavik recommends using an oil-based primer that will seal in knots, stains, and nail holes. This type of primer is typically more expensive than a water-based version, but it will offer the best long-term results.

When it comes to selecting the right type of paint for your cabinets, Slavik recommends choosing a semi-gloss or gloss finish. This type of paint will provide a durable, stain-resistant surface that’s easy to clean and maintain. It can be more expensive than a matte or satin finish, but it’s worth the investment to ensure your kitchen cabinets look new for years to come.

While you can choose to DIY your cabinet painting project, a professional service like N-Hance will save you the time and stress of trying to do it yourself. The team of professionals will also make sure you get a smooth, factory-like finish that you’ll be happy with for many years to come.

Top Reasons to Invest in a Garage Door

The garage door is an integral part of a home, and it can make or break its overall appearance. Many manufacturers offer digital visualization tools to help homeowners sort through styles and options.

Before purchasing panels, carefully measure the door opening to ensure that they will fit. Also, purchase rubber weather stripping to lay over the bottom panel.

Insulating value

Insulating value is an important consideration when choosing a garage door. You want a durable material that can prevent heat loss or air leakage while promoting energy efficiency. Polystyrene and polyurethane are both highly regarded for their thermal insulation properties. Polystyrene is also moisture resistant, which can help protect your valuable items stored in the garage from damage.

R-value is an imperial measurement that indicates how well a material resists the flow of heat. It is often used to measure the insulating properties of foam insulation, but it can also be applied to other types of materials. The higher the R-value, the better the insulating properties. However, it is important to understand that R-value does not equate to performance.

In general, it is recommended to have a garage door with an R-value between R-6 and R-9. This range is ideal for detached garages that are not conditioned (heated or cooled). These doors will reduce cold air flow into the garage and protect stored items.

For attached garages, an R-value of R-13 or higher is appropriate. This will help reduce heat transfer into the living space and can save you money on heating and cooling costs. High-value garage doors are more expensive than their lower-rated counterparts, but they offer superior strength and thermal performance. Additionally, they can be easily maintained through regular cleaning and minor repairs.

Durability

A durable garage door is an essential part of a secure home. It can prevent theft and provide protection against harsh weather conditions. It can also prevent injuries from pinched fingers and broken hinges. A durable garage door can also be equipped with energy-efficient features to help lower your utility bills.

When choosing a garage door, consider its durability and R-value, which measure the material’s thermal resistance to heat flow. A higher R-value means that the garage door is more insulating and will keep cool air in during warm temperatures and warmer air out in cooler weather.

There are several types of durable garage doors, including roll-up models and sectional ones. Roll-up models consist of panels that stack on top of each other when opened. These doors are affordable and easy to operate. However, they require regular maintenance to ensure their safety and durability. It’s important to check the track mounts, pulleys, and springs for signs of wear or damage. If you find any problems, make sure to get them repaired immediately to avoid accidents and injuries.

If you want a durable garage door that is both stylish and functional, choose steel or vinyl. Steel is a popular option because it offers a variety of design options and is low-maintenance. Its outer layers can be customized with wood composite cladding or stucco overlays for a more traditional look, while its foam core adds strength and insulation. Vinyl is child-proof and a good choice for homes in coastal areas, but it may crack in extremely cold weather.

Safety

Safety is one of the most important reasons to invest in a high-quality garage door. The garage door is not just an entrance to your home, but it also protects the valuable items and people you keep inside it. Unfortunately, a poorly-constructed or maintained garage door can cause serious injury and property damage.

To prevent this, most modern garage doors come with several built-in safety features. The most critical feature is the auto-reverse mechanism, which stops the garage door from closing on people, pets, or objects in its path. This simple yet essential safety feature can prevent serious injuries and even save lives.

Another safety feature is photo sensors, which are installed on either side of the garage door opening. They emit and detect a beam of light; if anything breaks that beam as the garage door is moving, the system will immediately stop and reverse direction. These sensors are especially useful for catching smaller objects in the path of your garage door, like toys or small pets.

To ensure these safety mechanisms are working properly, it is important to perform regular tests. Try placing an object such as a brick or a block of wood under the door when it is closed; if the safety eyes break the beam of light, your garage door should reverse. You can also check your force settings by locating the force adjustment screws on the back panel of your opener; the screw on the left is for open force, while the one on the right adjusts close force.

Energy efficiency

A garage door is one of the best places to invest in energy efficiency. It helps keep the temperature in your home stable, which reduces the strain on the HVAC system and results in lower energy bills. In addition, insulated doors contribute to the green movement by reducing the carbon footprint of your home.

The insulation material you choose determines your energy efficiency. The higher the R-value, the better. The insulation should be moisture-resistant and durable so that it can withstand harsh weather conditions. There are two popular choices: expanded polystyrene and extruded polystyrene (XPS). EPS is a budget-friendly option, while XPS offers superior durability. Polystyrene is also lightweight, making it easy to handle during installation.

You can also opt for double- or triple-glazed windows, which further increase your energy efficiency by minimizing heat transfer. However, you should note that this feature introduces thermal breaks into the door, which reduces the overall R-value.

Besides choosing the right insulation material, it is essential to ensure that your garage door is installed properly. This will ensure that air leakage is minimized and the insulating value is maximized. A professional can help with the installation process by ensuring that the door is correctly leveled, sealed, and adjusted. They will also make sure that the door is free from gaps and other flaws that can reduce its insulating power.

Navigation